

 +1 (855) 418-2323

 File Converters
In Microsoft 365 Excel for Windows, open a blank workbook and choose Data > Get Data > From File > From JSON. Select your local .json file. Power Query opens a preview where you can check the rows and columns before loading the data into a worksheet. Save the workbook as .xlsx when the table is ready.
This walkthrough uses a three-record sample so you can see what Excel should produce at each stage. You can open the original JSON in a text editor to inspect its contents. Use Power Query when you want to work with those records in cells and keep the source file for reference.
Download the sample JSON file
Download json-excel-sample.json, or copy the following into a plain-text editor and save it as a UTF-8 file with the .json extension. Save it somewhere you can find from Excel, such as a folder for this example. If you’re using a file from another application, use its JSON export as the starting point. Changing the extension of a CSV or a text log leaves the contents as they were.
[
  {"record_id":"R-001","customer":"North Studio","quantity":2,"active":true},
  {"record_id":"R-002","customer":"West Workshop","quantity":4,"active":false},
  {"record_id":"R-003","customer":"East Office","quantity":1,"active":true}
]
The square brackets enclose an array. Each pair of braces encloses one object with four fields. For this example, each object is one record and becomes one worksheet row. The field names become column headers. The quoted IDs and customer names are text, the quantities are numbers, and the unquoted true and false values are Booleans.
| record_id | customer | quantity | active |
|---|---|---|---|
| R-001 | North Studio | 2 | true |
| R-002 | West Workshop | 4 | false |
| R-003 | East Office | 1 | true |
Keep this table handy during the import. The three distinct IDs tell you which records came through. The quantities add up to 7, and R-002 is the only inactive record. A row count alone would miss a quantity attached to the wrong customer, so check the values against their IDs as well.
Import the file with Power Query
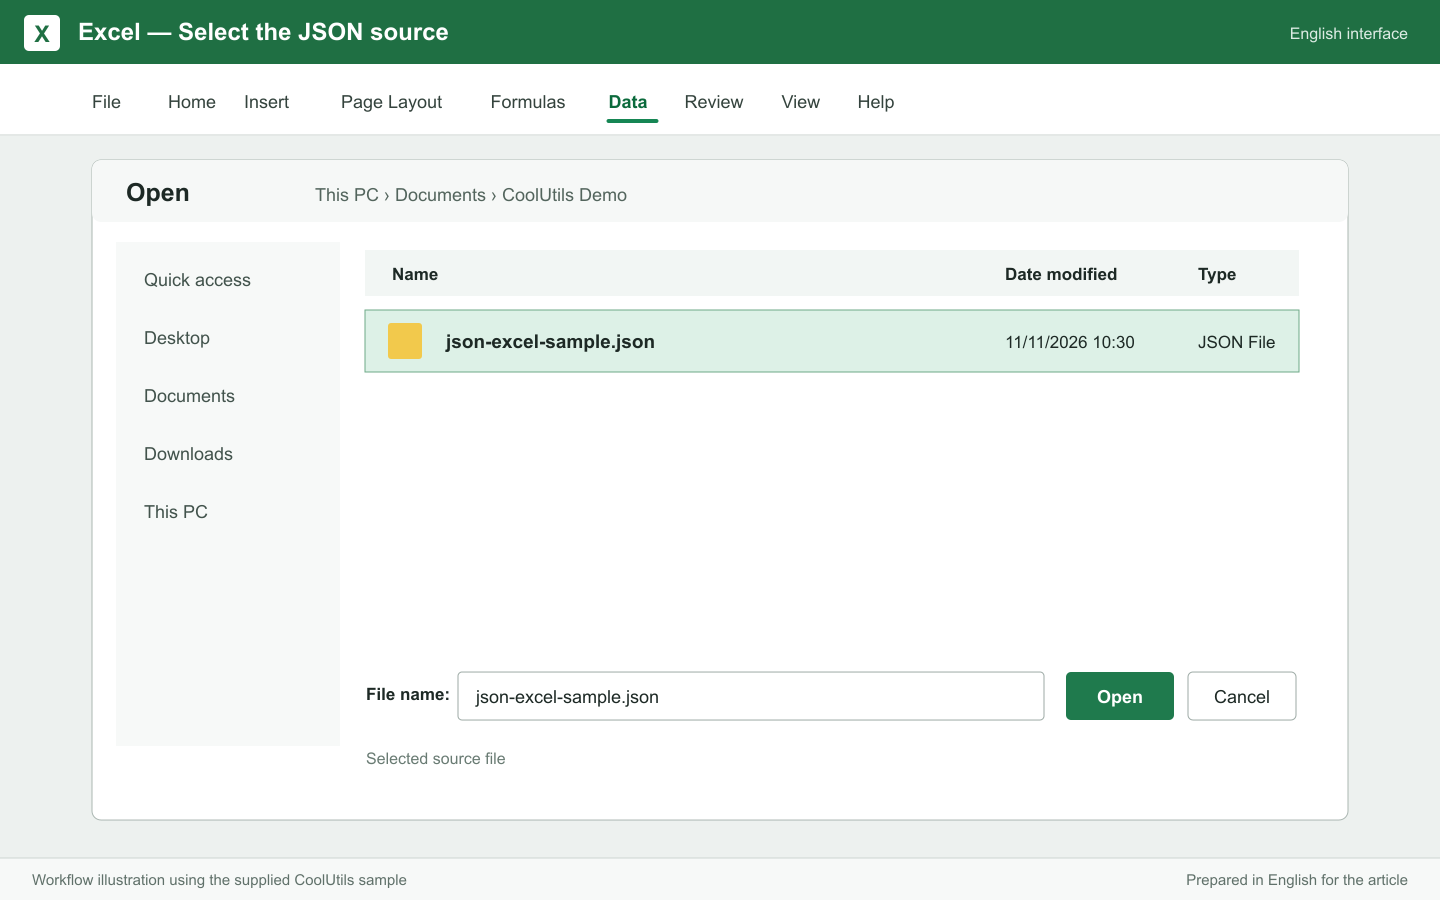
- Open a blank workbook in Microsoft 365 Excel for Windows. On the Data tab, select Get Data > From File > From JSON.
- In the file dialog, select
json-excel-sample.jsonand choose Open. If you keep several exports in the same folder, check the filename before continuing.
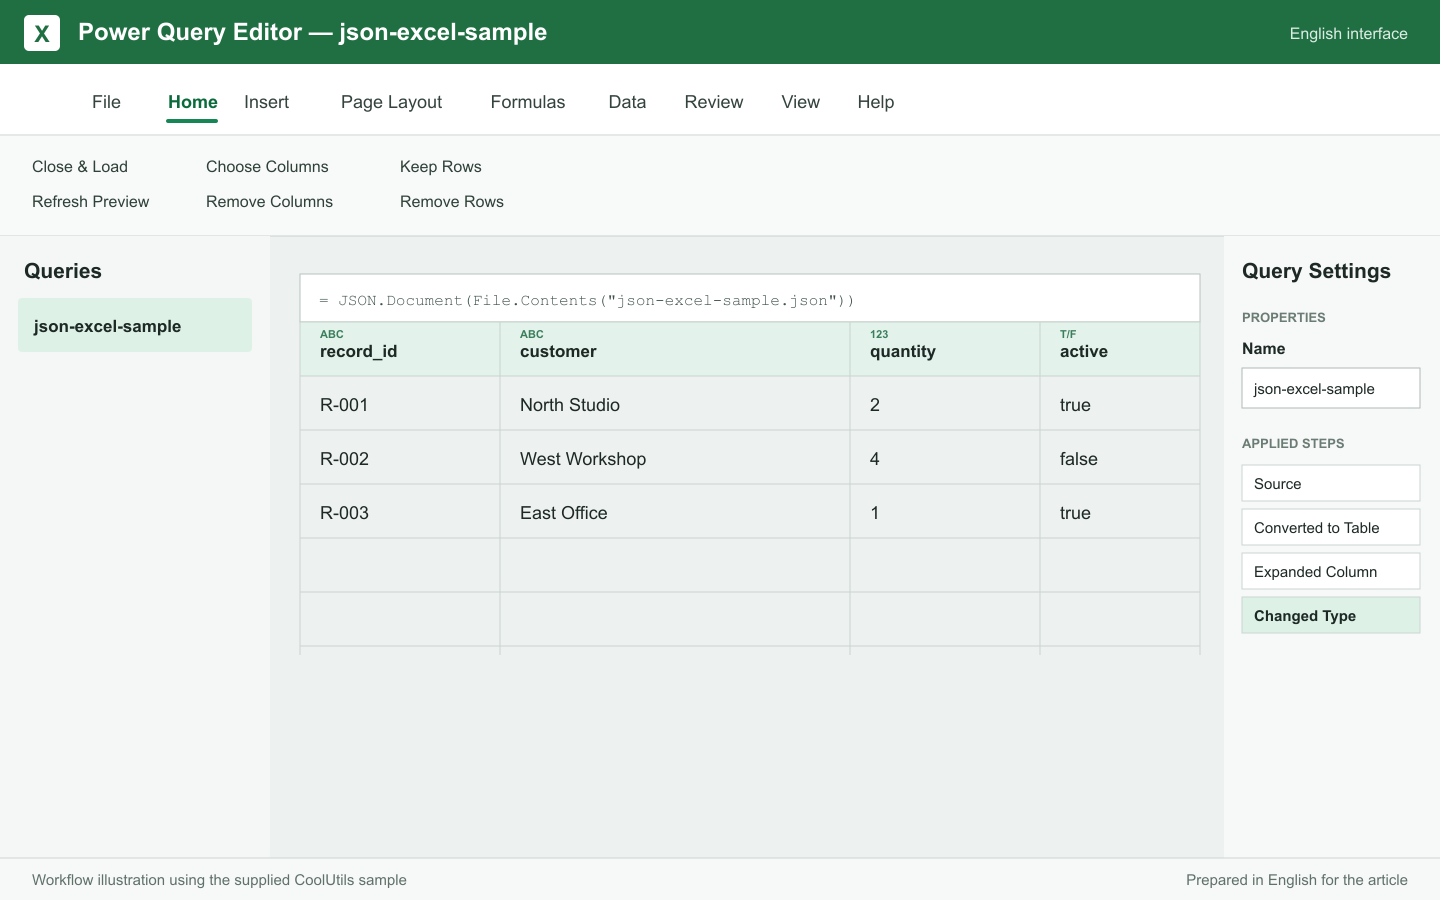
- When Power Query Editor opens, look at the preview and the Applied Steps pane. Power Query can detect the table and apply steps to flatten JSON automatically. If the preview already has the four expected columns, continue to the checks below.
- If you see a single column of records, inspect an entry first to confirm it holds the four sample fields. Use the expand control on that column to bring the fields into the table. If the preview starts with a list, convert that list to a table before expanding its records. Keep the record level that gives you one row per ID.
The preview for another file can look different. For example, an export may have a top-level object that contains a list of records under a field such as results. Inspect that collection before choosing what to expand. A list of records and a list inside one record represent different levels. Expanding the latter can give you several rows for a single ID, which may be useful for a detail report but changes the meaning of a worksheet intended to contain one row per record. Microsoft explains automatic detection and the handling of nested data in its Power Query JSON connector guide.
Check the table before you load it
Start with the headers. You should be able to identify record_id, customer, quantity and active. If an expansion adds a prefix to a header, you can rename that column to match the sample. Check the contents before renaming so that similarly named fields from different levels keep their correct meanings.
Next, check the column types in Power Query. Keep record_id and customer as Text. Set quantity to Whole Number and use True/False for active. Examine any type step already applied to the table. If a type change causes an error, select the preceding step and look at the value as it arrived from the source. That is often enough to tell whether the field was empty, written as text, or in a different format from the other records.
Read across each sample row. R-001 should show North Studio, a quantity of 2 and an active flag of true. R-002 should show West Workshop, 4 and false. R-003 should show East Office, 1 and true. If a record appears twice, step back through the expansions to find where the extra row came from. If a record is missing, look for a filter or an expansion that dropped it before changing the source file.
Load the worksheet and save an XLSX copy
Once the preview matches the sample, select Home > Close & Load. In the blank workbook, Excel can load the query result into a new worksheet. If you use Close & Load To, choose Table and a New worksheet so the sample has a sheet of its own.
Check the table in the worksheet. There should be four columns and three data rows. Excel may display the Boolean values as TRUE and FALSE. Check that the quantity column contains numbers you can add and that its total is 7. If you want to use a formula in the sample layout shown above, enter =SUM(C2:C4) in an empty cell outside the imported table. Use the actual range if the table starts somewhere else.
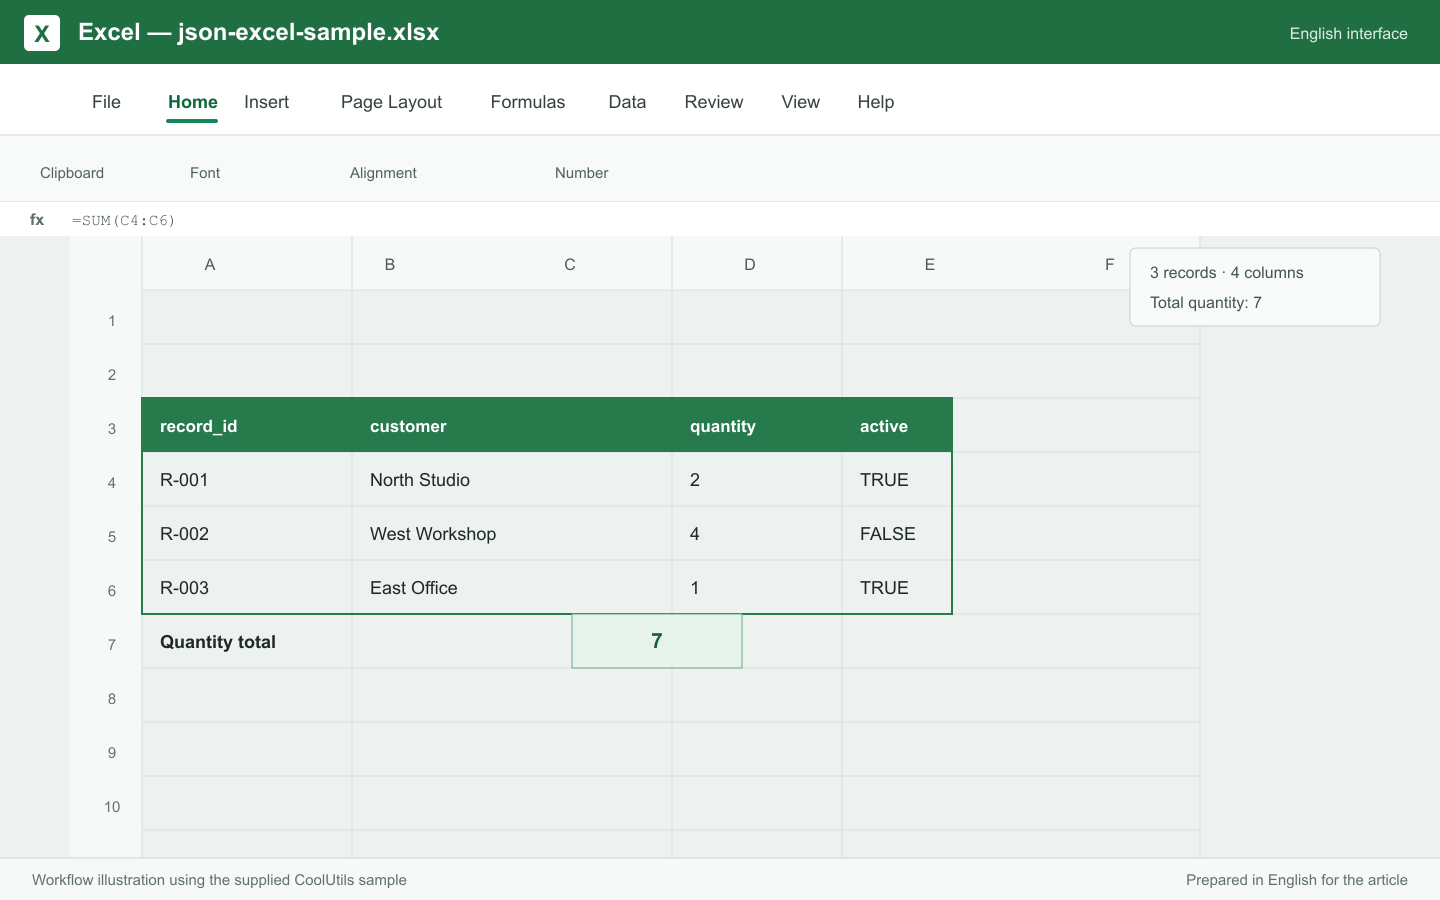
Choose File > Save As and save the workbook as json-excel-sample.xlsx using the Excel Workbook (.xlsx) format. Reopen that workbook and check the same IDs, quantities and flags. Keep json-excel-sample.json as your original. The workbook saves the worksheet and its imported data, and the query can still refer to the local source path. If you later move the JSON and want to refresh the query, update the source location in Excel.
Fix common JSON import problems
| What you see | What to check |
|---|---|
| Excel reports a parsing error | Open the source in a text editor. Check for missing brackets or quotes, extra commas, or a file that contains an error message in place of the export. Request a fresh export if the file appears incomplete. |
| Each line is a separate JSON object | You may have JSON Lines. A file of independent records on separate lines needs the JSON Lines procedure in Microsoft’s connector guide. |
| A column still shows List or Record | Inspect a value to see which fields or items it contains. Expand only the collection needed for your worksheet and compare the row count again. |
| The From JSON command is missing | Confirm that you are using the desktop Windows edition covered here. Check Microsoft’s connector instructions for your edition before looking for the same route on another platform. |
| The imported record count differs from the source | Compare the IDs and review Applied Steps from top to bottom. Look for the first filter or expansion after which the count changes. |
For an export you did not create, try the small sample first. If the sample imports and the real file fails, compare the structure of the two files. The real export might wrap its records inside another object, use JSON Lines, or contain an incomplete final record. A file that opens in a text editor can still contain data the connector cannot parse. The exact error message helps you decide whether to repair the export or choose a different import route.
If the real file loads but some fields are blank, inspect several records in the source. A field may be optional, empty, or stored at a different level. Keep those distinctions in mind before filling missing values with zero or deleting a column. For a shared workbook, compare a few records against the source after reopening it, especially if the table will be used for totals or reporting.
Check a new export before replacing the old one
If you receive the same report again with updated values, save the new JSON alongside the original. Try the import in a separate workbook or point a copy of the query at the new file. Compare the headers, row count and a few IDs before using the result in your existing report. An export can gain or lose a field when the source application changes. If the preview shows an error in an expansion or type step, select the step just before it to see which fields are available now. Keep the original workbook until the new table gives you the columns and records your report expects.
If you share the result, decide whether the recipient needs the saved rows or a workbook they can refresh. For a copy that contains just the saved values, copy the table to a new workbook and use Paste Values. Check the resulting headers and row count before sending that workbook. For a workbook the recipient needs to refresh, include the JSON source and explain where to put it. The original query points to the file you selected on your own computer. The recipient may need to set the source path to the location where they saved their copy.
Convert JSON to XLSX in a browser
If you need a workbook from a local file and prefer a browser conversion, you can convert JSON to XLSX online. Upload the JSON file, select XLSX and download the workbook. Check its rows and columns against your source, especially if the original contains nested values.
Frequently asked questions
Do I need to write code to open the sample JSON in Excel? The sample uses the built-in JSON connector and the Power Query interface. You can import, inspect and load it using the menus in this guide.
Why do I still see List or Record in some cells? Those cells contain structured values. A record contains named fields, and a list contains items. Open a value to see what is inside and decide which fields or rows your worksheet needs before expanding it.
Does saving an XLSX workbook replace my JSON file? Excel saves the workbook as a separate file. Keep the original JSON so you can check the source records or refresh the query later.

